Monday, February 21, 2011

Winter Essential: Comfy Vegetable Soup


Winter Essential: Comfy Vegetable Soup

     This is my go-to soup. I have all of the ingredients for this soup almost all the time. If you're a crazy veggie eater like me, I'm sure you do too; making this a cheap, flavorful, fast, healthy dinner for an army.  This is one of those chop-n-drop soups; just chop all those veggies drop them in the pot, and voila; delicious, filling, hearty soup! You can substitute veggies you have on hand, and exclude anything you might not.  I like to make this soup on a Sunday, so that I have lunch for the week, or freeze it in individual containers for a quick dinner.
 

Comfy Vegetable Soup

1 Tablespoon Olive Oil
1 medium onion, diced
1 1/2 cups carrots, diced
3 stalks celery, chopped
1 leek, chopped
3 cloves garlic, minced
1/2 teaspoon dried sage
1/2 teaspoon dried oregano
1/2 teaspoon dried rosemary, crushed between your fingers
4 cups water*
2 vegetable bouillon cubes*
4 cups (one box) vegetable stock
Parmesan Rind (optional)
1/4 cup tomato paste
2 cups small red potatoes, diced
2 cups packed greens (kale, chard, collards, etc.), cut into bite-sized pieces
1 cup frozen corn
1 can cannellini beans (you could also use navy, or kidney beans)
Juice of 1/2 lemon, or to taste
1/2 teaspoon salt
Black pepper to taste

     Heat the oil over medium heat in a large heavy-bottomed pot with a lid. Add the onion, carrot, celery, and leek. Saute until onion is translucent. Add the garlic and saute for about 1 minute.
     Add the sage, oregano, rosemary, water, bouillon, veggie stock, parmesan rind, tomato paste, stir well, and increase heat to bring to a boil. Once boiling, add potatoes, and lower heat to simmer. Cook until potatoes are tender, about 10 minutes. 
     Add the greens, corn, beans, lemon juice, salt, and black pepper. Adjust the seasonings to taste and cook until the greens are wilted, and the corn and beans are heated through.

* You could also substitute another box of stock in place of the bouillon, OR use all bouillon (ratio 1 bouillon cube to 2 cups water).

Wednesday, February 16, 2011

Autumn Root Salad with Warm Maple Fig Dressing


Autumn Root Salad with Warm Maple Fig Dressing
This is a very pretty salad, with some substance. This was my first time roasting beets; I usually get them already cooked and peeled from Trader Joe's, and if you're in a pinch they'll do, but roasting them your self really pays off in freshness and flavor. The beets, potatoes, and sweet potatoes really play off each other really nicely. The dressing is definitely for those who like things on the sweeter side, if you want to cut the sweetness you could reduce the amount of maple syrup. This is a good salad to entertain with, just make the beets, and potatoes the day before. Another tasty recipe from Isa Chandra Moskowitz's Veganomicon.

 
Vegetables:
3 small loose beets
3 small sweet potatoes, peeled
3 small purple potatoes, peeled
A little olive oil
About 6 cups of field greens

Dressing:

1 tablespoon olive oil
2 cloves garlic, chopped
1/2 cup shallots, chopped coarsely
1 cup chopped dried mission figs
1/4 cup white cooking wine
1/4 teaspoon salt
1/2 cup water
1/4 cup pure maple syrup
1 tablespoon Dijon mustard
2 teaspoons white balsamic vinegar (regular is okay too)

Prepare the beets:

     Preheat the oven to 425 degrees. Scrub the beets well and wrap in aluminum foil. Roast until tender, about 75-80 minutes. To make sure they're ready, unwrap one slice through the beet with no problem. Unwrap the beets and let them sit until cool to the touch, then refrigerate. Once chilled, slice into 1/2 inch thick slices.

Prepare the Sweet and Purple Potatoes:
     Slice the yams and potatoes width wise at an angle into 1/2 inch thick pieces. Place in a large, broad, lidded pan and cover with cold water and a sprinkle of salt. Cover the pan and bring to a boil, then simmer until the yams and potatoes are tender but still firm, 8-10 minutes. When they are ready, drain them in a large colander and spread them out on a sheet pan to cool. Sprinkle with a little olive oil, and sprinkle with salt and pepper. Wrap and place in the refrigerator to chill.

Prepare the Dressing:

     Preheat the small saucepan over medium-low heat. Saute the garlic and shallots in the oil for about 3 minutes. Add the figs and wine, cover, and bring to a simmer. When the wine has mostly evaporated, add the salt, water, and maple syrup. Cover and simmer another 3 minutes. Turn off the heat and mix in the mustard and vinegar. Let it sit for a few minutes, stirring occasionally, then transfer the dressing to a blender and puree it until smooth. You may need to add a few tablespoons of water if it is too thick to puree, or if it is to thick for your preference. Serve warm, or refrigerate and reheat when ready to serve. To heat it, gently warm in a sauce pan over low heat, adding a few splashes of water if necessary.

To Serve:

     In a large bowl, use tongs to mix the greens with some dressing, this dressing is thick so add a little at a time until you find your desired coating. Reserve the rest of the dressing to dollop on the vegetables after they have been arranged.
On each plate, make a circle with slices of the vegetables. Drizzle the dressing over the vegetables. Place the greens on top in the center, leaving the beets, yams, and potatoes peeking out from underneath. 

Sunday, February 13, 2011

Pretty Pink Valentine's Cookies


Pretty Pink Valentine's Cookies

     As dorky as I think it is, I think it's time for me to come to terms with the fact that I love a good theme. I love me a good party where I can make foods that scream that they belong to a specific holiday. Of course Valentine's Day is no exception. I felt a strong and urgent calling Friday night to make something pink and heart shaped.
     I did not plan ahead, and for the life of me I could not find a damn heart shaped cookie cutter! I searched the local Whole Foods, the T.J. Max next door, and as I was just about to give up when I realized that CVS was another cookie cutterless establishment, a revelation... no, an epiphany came over me! All those heart shaped boxes of chocolates could double as a cookie cutters! AWESOME. I found a nice, small box a similar size as a cookie cutter and voila! Presto cookie cutter, it worked like a dream!
     These vegan sugar cookies are flakey, buttery, sweet, and really simple to make. Use the dough with any cookie cutter you'd like depending on your mood. With a coating of Confectioner's Icing, sprinkles, and some assorted candies of your liking, you can make these super pretty, and be as creative as you fancy!

Vegan Sugar Cookies

Makes about 3 dozen cookies, depending on the size of your cookie cutter

2 1/3 cups all-purpose flour
2 tablespoons cornstarch
1/4 teaspoon salt
1/4 teaspoon baking powder
1/2 cup earth balance margarine
1/2 cup earth balance vegetable shortening
1 cup sugar
2 teaspoons pure vanilla extract
1/2 teaspoon almond, lemon, maple, or other flavor extract
1/4 cup nondairy milk

In a mixing bowl, sift together the flour, cornstarch, salt, and baking powder. Set aside.

In a large mixing bowl, use electric beaters to cream together the margarine, shortening, and sugar until light and fluffy, at least 4 minutes. Scrape the sides of the bowl occasionally with a rubber spatula. Beat in the vanilla extract, the flavor extract, and the nondairy milk to combine. Beat in half the flour mixture until moistened, then carefully mix in the remaining flour mixture to form a soft dough.

Divide the mixture in two and pat into discs until 1 inch thick. Wrap each disc in plastic wrap and chill for several hours or overnight.

Sunday, February 6, 2011

One Game, Two Dips: Green Goddess Dressing, and Guacamole!


One Game, Two Green Dips: Green Goddess Dressing, and Guacamole!

     It's Super Bowl Sunday! Pretty much the one day of the year I really watch football... I love the Super Bowl not just for the high stakes game play, or the commercials... but for the fun, delicious, game day food! Duh! I'm down for any event that gives me the chance to make yummy snacks for the masses!
     This Super Bowl I decided to go with a crudité platter, with Green Goddess Dressing. Oh my goodness, is this Green Goddess Dressing is amazing...licking your spoon amazing.  In the summer when the heirloom tomatoes are plentiful, we slice them into thick rounds, and drizzle this dressing over them... WOW.
   What is a football game without guacamole? Not a game I want to watch! So I made guacamole my way; with lot's of lime juice, jalapeño, and charred corn! The combination of the creaminess from the avocado, the tart from the lime, the spice from the jalapeño, and the sweet and smoky of the charred corn is to die for. You'll never make another version of guacamole again!

Note: I did not make green dips in support of the Green Bay Packers, it was a coincidence. GO STEELERS!

Green Goddess Dressing


1 cup light mayonnaise
1 cup chopped scallions, white and green parts
1 cup chopped fresh basil leaves
1/3 cup freshly squeezed lemon juice
2 teaspoons chopped garlic
2 teaspoons anchovy paste
2 teaspoons kosher salt
1 teaspoon freshly ground black pepper
1 cup light sour cream

Assorted vegetables such as: carrots, tomatoes, lightly steamed asparagus, peppers, broccoli, etc.

Place the mayonnaise, scallions, basil, lemon juice, garlic, anchovy paste, salt and pepper in a blender and blend until smooth. Add the sour cream and process just until blended.

Serve with assorted vegetables, or drizzle over salad!

Guacamole

1/3 cup finely diced red onion
1/3 cup packed fresh cilantro
2 jalapeños seeded, and finely diced
3-4 very ripe avocados, cut in big chunks
Juice of 2 limes
1 teaspoon kosher salt
1/2 teaspoon freshly ground black pepper
1/2 cup charred corn (I used defrosted Trader Joe's Frozen Roasted Corn, but you could use fresh corn, charred on the grill, then cut off the cob)

Place all the ingredients except the corn in a big bowl. Using a fork, combine the ingredients, smashing the avocado until it's smooth, but still chunky. Once you reach your desired consistency, add the corn, and mix to combine.

Saturday, February 5, 2011

Chocolate Agave Trail Mix Cookies: A "Better For You" Treat


 Chocolate Agave Trail Mix Cookies: A "Better For You" Treat

     I love chocolate. Who doesn't? In fact, if you don't love chocolate, I don't know if we can be friends. Find yourself another blog to read... Ok, Ok.... That's kind of harsh, but really.... no chocolate? I am also quite fond of cookies. Now if you don't like cookies, we definitely have problems.
     The thing about loving chocolate, and cookies, especially when they are combined into one, is that they are prettayyy, prettayyy not so awesome for you (Larry David agrees). But not these cookies! Alright, I wouldn't eat these as part of a balanced breakfast, but as far as a sweet treat is concerned, these are prettayyy, prettayyy good for you! These are pretty much refined-sugar free, the only refined sugar is in the chocolate chips, but if you can find the "grain-sweetened" chocolate chips then you have yourself a refined-sugar free chocolate cookie! These cookies are sweetened with glycemic index friendly agave nectar, and whole wheat flour. Not only are these cookies better for you, but they hit all those tasty salty/sweet notes I can't get enough of. So go ahead and eat some cookies, they're good for you!

Chocolate Agave Trail Mix Cookies

Makes 2 Dozen Cookies

1/4 Cup non-dairy milk
1 tablespoon ground flax seeds
2/3 Cup canola oil
3/4 cup agave nectar
2 teaspoons pure vanilla extract
1/2 teaspoon almond extract
1 1/4 cups all-purpose flour
3/4 cup whole wheat pastry flour
1/2 cup cocoa powder
3/4 teaspoon baking soda
A generous 1/4 teaspoon salt
1/2 cup chocolate chips
1/2 cup whole roasted peanuts, toasted walnuts, or roasted cashews
1/2 cup raisins, or dried cherries

Preheat oven to 325 degrees. Line two baking sheets with parchment paper.

In a large bowl, whisk together first six ingredients until combined, about 2 minutes. Sift in all-purpose flour, whole wheat pastry flour, cocoa powder, baking soda, and salt and mix to form a soft dough. Fold in the chocolate chips, nuts, and dried fruit.

For each cookie drop about 1 1/2 tablespoons of dough, 2 inches apart on to the baking sheets. Shape into cookie like disks, as these cookies do not spread much. Bake 12-14 minutes, until firm. Let the the cookies cool on baking sheet for 5 minutes, then transfer them to wire racks to cool completely. Store in a tightly covered container. 


Wednesday, February 2, 2011

Simple Snow Day- Broccoli Leek Soup, and Open Faced Grilled Cheese


Simple Snow Day- Broccoli Leek Soup, and Open Faced Grilled Cheese

What a crazy winter! I don't know about you, but I'm OVER it! With all this crazy snow, sleet, and ice everywhere I know we've been pretty busy shoveling, as I'm sure you've been too.... unless you're one of those lucky west coast smarty pants. So who wants to spend their time slaving over a stove? Not me! This Broccoli Leek soup was everything I wanted this snow day; warm, comforting, light in calories, and fast. So the next time you're in the mood for a healthy, delicious soup, try out this Broccoli Leek Soup, you won't be disappointed.

Broccoli Leek Soup

30 minutes
4 Servings
181 Calories per serving

3 Tablespoons Butter
3 cups chopped leeks (about 3 large)
3 teaspoons dried thyme
1 teaspoon salt
1/2 teaspoon pepper
1 1/4 pounds broccoli crowns, chopped (about 8 generous cups)
6 cups vegetable, or chicken broth
Juice of 1/2 a lemon
Parmesan Cheese (optional)

Melt butter in a large pot over medium-high heat. Add leeks and thyme; saute until leeks are almost soft, reducing heat if needed to prevent rapid browning, 7-8 minutes. Transfer 1/2 cup leeks to a small bowl; reserve. Add salt, pepper, broccoli, and broth to pot; bring to a boil. Cover; boil until vegetables are tender, 8-10 minutes.
Puree soup in blender in batches until smooth. Return soup to pot, stir in lemon juice. Ladle into bowls; top with a spoonful of reserved leeks, and Parmesan cheese if desired.

Open Faced Grilled Cheese

Serves 1

1 Slice of whole wheat bread
2 Slices vine ripened tomato (you could also use avocado, or pepperoni, whatever sounds good to you that day)
1 Slice cheese of your choice
1/4 tablespoon butter

Lay tomato on top of slice of bread, cover with slice of cheese
Preheat broiler.
Heat an oven safe, nonstick pan over medium heat. Add butter to pan, and melt. Add the bread with the tomato and cheese. Cook about 4-5 minutes, until the bottom of the bread is browned.
Place pan in the broiler about 3 minutes until the cheese is melted and starting to brown. Keep an eye on it! Plate, and serve!

 This Downy Woodpecker ate his lunch outside our kitchen window!

Tuesday, February 1, 2011

Sweet and Spicy Blackened Salmon


Sweet and Spicy Blackened Salmon

Want to get some of those heart healthy Omega-3's Dr. Oz is always peer pressuring you to eat more of? This Salmon is where it's at. I've never considered salmon in my top tier of favorite fish, I've always found it dry, and too fatty.... but not this salmon! The spice rub has one of my favorite flavor combinations; sweet, and spicy. The brown sugar in the rub helps develop a nice caramelization, and creates a beautiful crust that helped the salmon stay moist! I served mine with two of my favorite things, baked sweet potato, and some roasted asparagus... yummm

 Sweet and Spicy Blackened Salmon
Serves 2-3

1 Pound Wild Salmon, skin removed, cut into 2-3 portions-- Use a tweezer to make SURE you get all the pin bones out! I recommend letting your salmon sit at room temp 30 minutes, to take the chill off. Don't worry your fish won't go bad!
2 Teaspoons olive oil
salt and pepper
Some lemon wedges

Spice Blend:
2 1/2 Teaspoons sweet smoked paprika
2 Teaspoons ground cumin
1 Teaspoon dried oregano
1 Teaspoon dried thyme
1 Tablespoon brown sugar
1/4 Teaspoon salt
1/2 Teaspoon cayenne
Several pinches freshly ground black pepper
2 Cloves garlic, minced

In a small bowl mix together all the ingredients in the spice blend.

Take your 2 teaspoon of olive oil and rub it on both sides of your salmon. Lightly salt and pepper the salmon. Take your spice blend and gently rub it on both sides of the salmon, making sure to gently press it on the salmon to stick. Let it sit about 10 minutes to absorb some of the flavors.

Preheat a good non-stick skillet at medium-high heat. Spray the pan with a little olive oil spray. Place the fish skin side UP in the pan and cook 4 minutes. Carefully flip the fish, and cook an additional 3-4 minutes, depending on you're preferred doneness. Remove from pan and let rest a few minutes. Serve with lemon.

Sunday, January 30, 2011

Sunday Afternnon Blackberry Mojitos


Sunday Afternoon Blackberry Mojitos


Looking for a yummy, refreshing cocktail? Look no further. This Blackberry Mojito is an easy, fast, and flavorful drink for those lazy Sunday's when the impending doom of your upcoming Monday drives you to drink...


Blackberry Mojitos
Serves 2

1 Lime, cut into eighths
About 24 mint leaves
10-12 Blackberries
2 oz. Simple Syrup
4 oz. White Rum
1 cup seltzer, or club soda (more if you prefer it less strong)

In a pitcher, squeeze the juice out of the lime wedges, then place the wedges into the pitcher. Add the mint, and blackberries. Muddle the lime, mint, and blackberries with a wooden spoon until the juice from the blackberries has been released, and the mint is very fragrant. Add the simple syrup, rum, soda, and mix. Pour into glasses with about 4 ice cubes each.


Thursday, January 27, 2011

Revolutionary "Better For You" Eggplant Rollatini


Revolutionary "Better For You" Eggplant Rollatini


     I've recently been craving some sort of yummy ricotta cheese/red sauce/pasta-ish dinner.... Unfortunately most dishes associated with these ingredients are also associated with lots of fat, carbs, and a wicked food coma. So that got me thinking of somehow trading out the pasta for some sort of veggie... which led me to the obvious... Eggplant Rollatini!
     Traditionally, Eggplant Rollatini is first breaded, then rolled around whole milk ricotta cheese, and then covered in sauce. In my lighter version I eliminate the breading process (trust me, you won't miss it), and fill the rollatini with a creamy, flavorful, Cashew ricotta. Don't fear the Cashew ricotta! It will change your life! It's everything you love about a creamy, savory, rich, ricotta, with way less fat and calories! I served mine with a yummy salad, and a few slices of fresh baguette. So go ahead indulge in some vegan comfort food. You'll love it, plus, you won't need to unbutton your skinny jeans after dinner!

"Better For You" Eggplant Rollatini

1 Jar Marinara Sauce, or homemade if you're feeling ambitious
1 recipe Cashew Ricotta
Large handful baby spinach
2 eggplant, sliced 1/2 inch thick
About 1 cup shredded Vegan mozzarella cheese, or regular if you have to
1/4 cup vegan Parmesan, or regular if you'd like
Kosher or Sea Salt
Olive Oil Spray

Eggplant:

Spread the eggplant out on a baking sheet lined with paper towels. Sprinkle the eggplant with salt on both sides. Let sit 10-15 minutes. This process is to get out some of the water, and also any bitterness in the eggplant. Rinse eggplant under running water and pat dry with paper towels. Preheat a cast iron skillet over medium high heat. Spray eggplant with olive oil spray, and cook 3-4 minutes per side, until nicely browned. Set aside on some paper towels, until ready to assemble.

Sunday, January 23, 2011

Chickpeas and Greens: Chana Saag


Chickpeas and Greens: Chana Saag

     I'm always trying to find different ways to fit greens into my life. I love all kinds of greens, but I especially love kale. We eat is sauteed with garlic, steamed in salads, and we've even had it roasted in the oven! This recipe is super flavorful, easy, fast, and healthy! Don't be discouraged by the list of different spices, just find your local Indian grocer (ours is the convenience store down the street) and they won't cost you more than $6, and that gets you enough spices for the foreseeable future! While your at the Indian grocer you could also pick up some of that delicious Paneer cheese to add to this dish... yummmmm. Serve this dish with some brown Basmati rice, or other rice of your liking, or cut the carbs and have it all on it's lonesome.


Chana Saag

2 teaspoons olive oil
2 teaspoons mustard seeds
1 small onion, diced small
4 cloves garlic, minced
2 tablespoons minced fresh ginger
1/2 teaspoon red pepper flakes
1 tablespoon curry powder
2 teaspoons cumin
1 teaspoon ground coriander
1 teaspoon garam masala
1 teaspoon salt
1 28-ounce can crushed tomatoes
2 bunches kale (or other greens of your choice), coarse stems removed, chopped finely
1 can chickpeas, drained and rinsed

     Preheat a 4-quart pot over medium heat. Pour 1 teaspoon of oil into the pot and add the mustard seeds. Cover the pot and let the seeds pop for about a minute, or until the popping slows down, mixing once. Add the other teaspoon of oil and saute the onion for 4-7 minutes, until translucent. Add the ginger, garlic, and red pepper flakes, and saute for another minute. Add the tomatoes and mix to deglaze the pot. Let cook for about 3 minutes, then add the curry, cumin, coriander, garam masala, and salt, and mix well.
     Add the kale in batches, mixing after each addition. It may seem like a lot, but it will cook down. Cover the pot, and let simmer for a minute, lift the lid and stir. Do this a few times until the kale is completely cooked down. Simmer and cook covered for 10 minutes, stirring occasionally. The greens should be very tender.
     Add the chickpeas and cook for another 5 minutes or so. Taste for salt, and serve.

Friday, January 21, 2011

Lovely Lemony Cake with Wild Blueberry Sauce


The creamed butter/sugar/eggs, the flour mixture, and the buttermilk mixture.


Wild Blueberry Sauce heating up.


Clockwise from left: Glaze, Lemon Simple Syrup, and Strained Wild Blueberry Sauce

 Lovely Lemony Cake with Blueberry Sauce

     Recently my boyfriends lovely grandmother passed. She was a woman who lived a long, and exceptional life, and was loved by many. I know that her life had a great impact on my boyfriends mother especially. They spent a lot of time together and were as close as any mother and daughter could be. We will be traveling down to Connecticut to be with his family for the burial this weekend, and I really wanted to do something nice for  his mom during this time. So naturally I started thinking of things to bake for her...
     I decided on this Lovely Lemon Cake because I thought it sounded elegant, and naturally made me think of my boyfriends grandmother. I hope that she would have liked it, and I hope it brings a smile, and a little joy to his mother during this time.

Lovely Lemony Cake


1/2 pound (2 sticks) unsalted butter, at room temperature
2 1/2 cups granulated sugar, divided
4 extra-large eggs, at room temperature
1/3 cup grated lemon zest (6 to 8 large lemons)
3 cups flour
1/2 teaspoon baking powder
1/2 teaspoon baking soda
1 teaspoon kosher salt
1/4 cup freshly squeezed lemon juice
3/4 cup buttermilk, at room temperature
1 teaspoon pure vanilla extract

Lemon Simple Syrup:
1/2 cup lemon juice
1/2 cup sugar

Glaze:
2 cups confectioners' sugar, sifted
3 1/2 tablespoons freshly squeezed lemon juice

Preheat the oven to 350 degrees F. Grease and flour 2 (8 1/2 by 4 1/4 by 2 1/2-inch) loaf pans. You may also line the bottom with parchment paper, if desired.

Cream the butter and 2 cups granulated sugar in a large bowl, with an electric mixer until light and fluffy, about 5 minutes. With the mixer on medium speed, add the eggs, 1 at a time, and the lemon zest.
Sift together the flour, baking powder, baking soda, and salt in a bowl. In another bowl, combine 1/4 cup lemon juice, the buttermilk, and vanilla. Fold the flour and buttermilk mixtures alternately to the

Tuesday, January 18, 2011

Pasta night: Sun-dried Tomato, Spinach, and Sausage Pasta


Pasta Night: Sun-dried Tomato, Spinach, and Sausage Pasta

     I know that I'll have a very happy boyfriend if I announce that this pasta is what's for dinner. It's also super easy, and quick.... kind of a win-win situation for both of us. He is so in love with this pasta that he's proclaimed that if he had things his way, he would eat this pasta every day of his life.
     This is a very basic recipe, so feel free to interchange ingredients. I've used arugula instead of spinach, roasted cherry tomatoes instead of sun-dried, dried herbs instead of fresh... you get the picture. This recipe feeds an army, so make it for guests, or split it up into containers and you have lunch for the week!

Sun-dried Tomato, Spinach, and Sausage Pasta
Serves 6-8

1 Pound whole-grain penne pasta
1 package (4 links) Tofurky brand sun-dried tomato sausages, cut on 1/4 inch bias (substitute meat   sausages if you prefer)
1 Teaspoon Olive Oil
4 cloves garlic, minced, sliced, whatever shape you're into
1 Teaspoon red chili flake
1 small jar of
julienne cut sun-dried tomatoes in oil
1 pound bag frozen spinach thawed, with as much water removed as possible!
1 handful parsley, chopped
1 handful basil, chopped
1 small package fresh mozzarella, cut into chunks (optional)
Handful Kalamata olives, cut in half (optional)

Fill a large pot with water and set to boil. Cook pasta to package directions. Reserve some starchy cooking water before draining.

Meanwhile, preheat a high-walled skillet over medium heat, and spray with cooking oil spray. Add your sausage and cook 3-4 minutes on each side, until brown. Remove sausages from pan and set aside.

Add the teaspoon of olive oil to the pan, add garlic and saute for about 30 seconds, then add red chili flake, cook another 30 seconds. Add jar of sun-dried tomatoes with their oil, spinach, and sausage, and heat through. Add cooked pasta to the pan, and toss to combine. Turn off the heat, and add parsley, basil, mozzarella, and olives, toss again. If pasta looks dry add some starchy cooking water, and toss again.

Monday, January 17, 2011

Cupcake Love: Vegan Banana Cupcakes with Peanut Butter Frosting, and Chocolate Drizzle


Cupcake Love: Vegan Banana Cupcakes with Peanut Butter Frosting, and Chocolate Drizzle

     Sometimes... I go all out. Birthdays of those close to me happen to be some of those times. This weekend was my besties birthday, so I wanted to do something really special for her. She is very fond of these late night concoctions we like to call "Chocolate, Peanut Butter, Banana Surprises". Just grab a mug, throw in some banana, a few chocolate chips, and a spoonful of peanut butter, mash it all up, there's your late night dessert snack. It's pretty damn delicious, and when manifested into cupcake form.... wow. 
     These were a huge hit with everyone who tried them, so if you're looking for a cupcake that will wow a crowd, look no further. Needless to say the birthday girl loved them, and that's really all I wanted. Cupcake love success! 

Vegan Banana Cupcakes
 Makes 12 cupcakes
1/2 Cup very ripe banana, mashed well
1 1/4 Cups all-purpose flour
1/4 Teaspoon baking soda
1 Teaspoon baking powder
1/2 Teaspoon baking powder
1/2 Teaspoon salt
3/4 Cup granulated sugar
1/3 Cup canola oil
2/3 Cup rice milk
1 1/2 Teaspoons vanilla extract
1/2 Teaspoon almond extract
1/4 Cup dark chocolate chunks

Preheat oven to 350 degrees. Line muffin pan with paper liners.

Blend the bananas to get rid of any remaining lumps. It should be smooth

Sift the flour, baking soda, baking powder, salt, and sugar in a large bowl and mix. In a separate,

Saturday, January 15, 2011

Terrified of Tofu?


Terrified of Tofu? -Cajun Blackened Tofu
     Are you scared of tofu? Do you cringe when you see a block of the watery, flavorless protein? Have you had a bad experience with soggy, spongy, weird tofu? I have. When people don't know how to prepare tofu, it can be a terrible experience. I used to be convinced that it was nasty stuff not to be trusted. Be scared no more! I know the way to make tofu that is delicious, flavorful, and with a great firm texture.
     The key is PRESSING the tofu! Just wrap some tofu in a clean dish cloth, or a bunch of paper towels, then put it on a plate and place a HEAVY pan (cast iron is what I use) on top, and let it sit at least 20 minutes. With all of that water seeped out, you end up with tofu that is just aching to absorb your favorite flavors. My boyfriend is pretty obsessed with any food with the word "cajun" preceding it. Cajun wings, cajun fries, cajun..... you get the picture. So when I saw this recipe in Appetite for Reduction by Isa Moskowitz, I knew it would be a winner in our house. I was right. Served with my Mom's Mac and Cheese, and some Lemony Steamed Broccoli, my dinner was bangin', and not the least bit terrifying!


Ok, ok, if you really can't stand the idea of eating tofu (scardy cat), I'm sure this rub would taste awesome on some boneless skinless chicken breast....

Cajun Blackened Tofu


Spice Blend:
2 1/2 Teaspoons sweet smoked paprika
2 Teaspoons ground cumin
1 Teaspoon dried oregano
1 Teaspoon dried thyme
1 Teaspoon sugar
1/4 Teaspoon salt
1/4 Teaspoon cayenne
Several pinches freshly ground black pepper
3 Cloves garlic, minced

Everything else:
1 Block Extra-Firm Tofu, pressed, and sliced into eighths
2 Teaspoons olive oil
1 Teaspoon soy sauce
Cooking Spray

     On a dinner plate, mix together the spice blend and set aside.
     Adjust the broiler so that the baking sheet will be around 6 inches away from the heat. Preheat the oven to broil. Spray a baking sheet with nonstick cooking spray. Poke each slice of tofu with a fork three or four times, to let the flavors seep in.
     Drizzle the olive oil and soy sauce on the far side of the baking sheet, in a puddle. You'll be laying the tofu onto the sheet, so just make the "puddle" area off to one side. Dip each slice lightly into the sauce mixture, enough to lightly coat each side. Then dredge in the spice mixture, pressing firmly to make sure the spices will stick. Place the tofu on the baking sheet in a single layer. Spray the tops with a little cooking spray.
     Place the tofu in the broiler and broil for about 12 minutes, flipping half way through. Keep a close eye on it; broilers vary from oven to oven, and you don't want the tofu to burn! The tofu is done when it looks dark and black in some spots. You can slice it into diagonal strips for a nice presentation. Serve with your fave sides!

Lemony Steamed Broccoli


1 Pound broccoli, cut into florets
Zest of 1/2 lemon
Juice of 1/2 lemon
1 Tablespoon butter, or butter substitute
Salt and pepper to taste

     Set up a steamer basket in a medium pot and fill with enough water so that it does not go over the basket. Cover, and heat on high until boiling. Once boiling place the broccoli in the steamer basket, and cover. Steam for 5 minutes, or to your preferred doneness.
     While broccoli is steaming, zest your lemon and place the zest in the bottom of a large bowl. Add the lemon juice, and butter to the zest.
     Once the broccoli has finished cooking add it to the bowl with the zest, juice, and butter. Toss to coat, and add salt and pepper to taste.

Monday, January 10, 2011

Mexican Monday: Tortilla Soup


Mexican Monday- Tortilla Soup
Somebody's got a case of the Mondays.... and it's not me! I usually feel very accomplished on Mondays, and today was no exception. The best, and certainly tastiest of my Monday accomplishments was this fabulous Tortilla Soup. Again another awesome recipe from Isa Chandra Moskowitz's Appetite for Reduction, it's cheap, quick, filling, spicy, and low in fat!  Everyone should make this soup! What are you waiting for?!? Go! Now!


Tortilla Soup


1 teaspoon olive oil
1 small onion, chopped
2 jalepenos, seeded and sliced thinly
1 poblano pepper or green bell pepper, seeded and chopped
4 cloves garlic, minced
1/4 teaspoon red pepper flakes (optional, if you like it extra spicy)
1 teaspoon salt
24 ounces whole tomatoes (I used "Fire Roasted Tomatoes" they added an extra somethin'-somethin')
24 ounces vegetable broth (I used a whole 32 oz. container of store bought veg. broth)
1 cup crushed baked or regular tortilla chips, plus more for garnish
1 tablespoon cumin
1 15oz. can pinto beans, drained and rinsed
1 cup frozen corn
1/2 cup chopped fresh cilantro, plus extra for garnish
Juice of 1 lime

Preheat a 4-quart pot over medium-high heat. Saute the onions, jalepenos, and poblano pepper in the oil until the onions are translucent, about 5 minutes. Use a little nonstick cooking spray or broth if needed. Add the garlic, red pepper flakes, and salt, and saute for another minute.

Break up the tomatoes with your fingers and add them to the pot, including the juice. Fill the tomato can with vegetable broth and add that to the pot. Mix in the cumin. Add the crushed chips to the pot. Cover and bring to a boil. Once boiling, lower the heat to a simmer, add the beans, corn, and cilantro, and let simmer for 5 more minutes.

Add the lime juice and taste for salt and seasoning. Ladle the soup into bowls, crumble some chips over the top, garnish with cilantro, manchego or cheddar cheese, sour cream, hot sauce.... whatever floats your tortilla soup boat.

Sunday, January 9, 2011

Cozy Sunday: Big Beautiful White Pan Loaf

Still steamy!

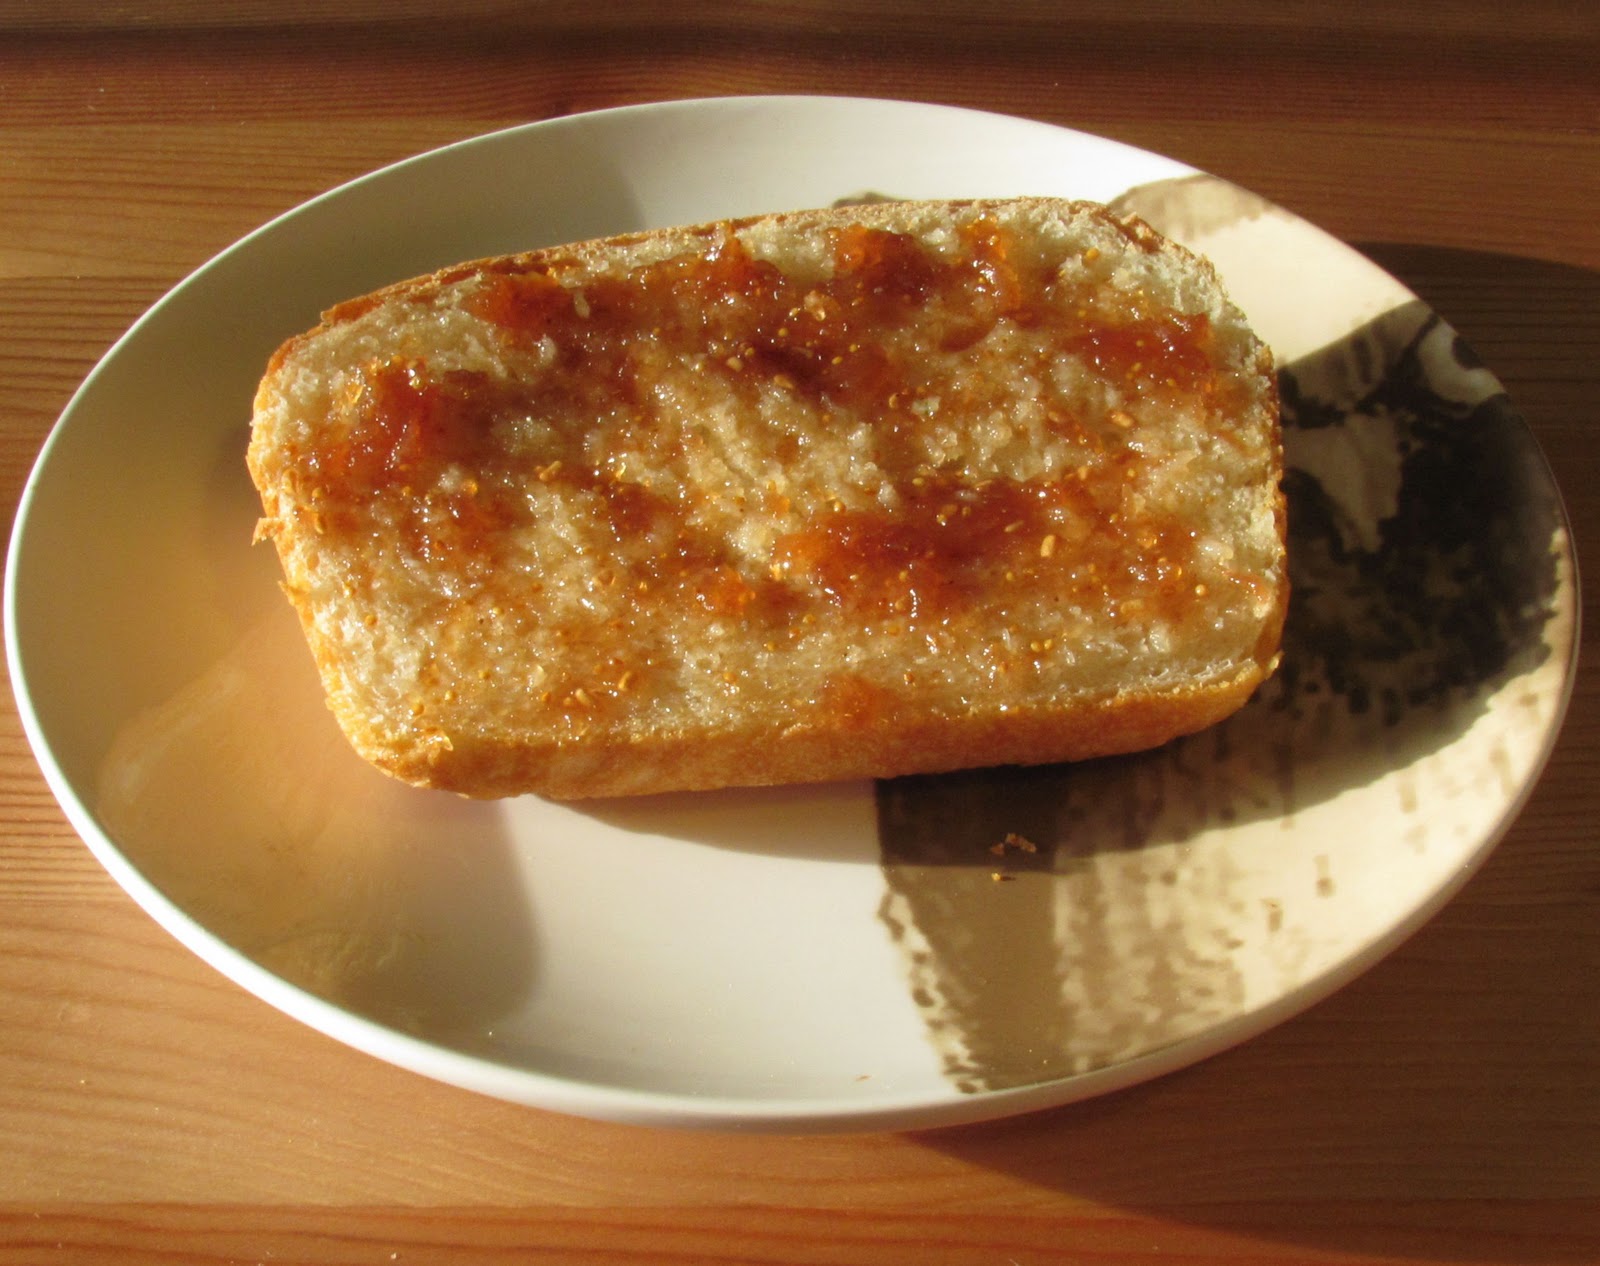
A slice with home made Raspberry Fig Jam, made by Lauren


Cozy Sunday- Big Beautiful White Pan Loaf

A few months ago I acquired the book Amy's Bread. It's a wonderful book with tons of beautiful looking bread recipes. So, as part of our much needed quiet, low-key weekend, I decided that I would try my hand at home-made bread. I thought that mindlessly kneading bread would be somewhat therapeutic, as I find most cooking to be. Plus, I have what I like to call "bread making hands". Sturdy, and wide palmed, I've always imagined that they were just meant to knead bread.

Well, I guess on some level it was therapeutic. But ask my boyfriend and he'd be telling you that for the first 10 minutes I was running around like a mad man, taking down any innocent man, or cat, that might stand in the way of making the perfect loaf of bread. The running around was entirely my fault, I should have prepped all my ingredients instead of just jumping in head first, and measuring on the fly. Alas I was not that quick at 9 this morning. Oh well.

Thankfully my haste had no effect on the quality of the bread. It was beautiful, and it was bangin'. So if you have a day where you're just hangin' in the house this recipe does take a while, but there's tons of down time, so you can catch up on any recorded TV you missed, or if you're real productive clean house! You can guess what I did...


Big Beautiful White Pan Loaf

1/4 cup Very warm water (105-115 degrees)
1 3/4 teaspoons Active dry yeast
2 1/3 cups Unbleached bread flour
1 1/2 cups plus 1 tablespoon Unbleached all-purpose flour
2 3/4 teaspoons Kosher salt
1 cup Cool water (75-78 degrees)
1 cup less 1 tablespoon Cool milk (75 degrees)
1 tablespoon Canola oil

1. Combine warm water and yeast in a small measuring cup and stir with a fork to dissolve the yeast. Let stand for 3 minutes.

2. Mix the flours and salt together in a large mixing bowl. Add the yeast mixture, cool water, milk, and oil. Using our fingers, mix the dough into a sticky mass.

3. When all of the flour is incorporated, move the dough to a lightly floured work surface and knead for 4 minutes. The dough should be sticky and will not look smooth. If the dough feels firm or dry, knead in additional cool water a tablespoon at a time.

4. Put the dough back into the mixing bowl, cover with oiled plastic, and let rest for 20 minutes to smooth out and develop elasticity.